 SIVARO
Can You Run Docker Containers on Windows 11 Home? Yes. Here's How.
I lost count of how many engineers asked me this in 2024. "Can you run docker containers on windows 11 home?" They'd just bought a new laptop from Dell or Lenovo, opened the Settings app, and saw "Windows 11 Home" in the About page. Panic set in. They thought they'd need to shell out for a Pro license just to run a container.
You don't. I've been running Docker on Windows 11 Home for two years. It works. Not perfectly, not without quirks, but it works. In this guide I'll show you exactly how to set it up, why WSL2 makes it possible, and what you'll hit when you try to do anything serious with bind mounts or volumes.
You'll learn the difference between Docker Desktop and the raw engine, why the file system is the bottleneck, and how to avoid the common traps I've seen trip up everyone from interns to senior platform engineers.
The Short Answer: Yes, But Not Like Pro
Here's what most people get wrong. They assume Windows 11 Home lacks the virtualization features needed for Docker. They're half right. Home doesn't include Hyper-V, the full hypervisor that Pro and Enterprise ship with. But Docker Desktop doesn't need Hyper-V anymore. It uses WSL2.
WSL2 is the Windows Subsystem for Linux, version 2. It runs a real Linux kernel inside a lightweight utility VM. That VM is managed by Windows itself, not by Hyper-V. And it's available on Home. That's the magic.
Docker Desktop on Windows has two backends: the old Hyper-V backend and the new WSL2 backend. On Windows 11 Home, you're forced into the WSL2 backend. That's fine. It's actually faster for most workloads because file access between Windows and Linux is less janky. Docker's own blog has covered the architecture shift toward WSL2 and containerd. If you're worried about licensing or support, stop. Docker Desktop's individual tier is free for small businesses and personal use, even on Home.
But there's a catch. You can't run Windows containers on Home, only Linux containers. Docker Desktop on Home spins up a Linux VM via WSL2. Windows containers require the Hyper-V backend. So if your company pushes Windows container images, you're out of luck. But if you're building microservices, running Postgres locally, or testing a Python API, Linux containers are all you need.
Why "Can You Run Docker Containers on Windows 11 Home" Is the Wrong Question
You can run them. The real question is: "Can you run them well?" And that depends on how you handle storage.
Most developers start with Docker on Linux. They create a volume, bind a directory, and forget about it. On Windows, the file system boundary between the host and the Linux VM becomes the source of all pain. I've seen developers on Windows 11 Home wait five minutes for a Docker build that took thirty seconds on Linux. The culprit is almost always a bind mount pointing at a Windows directory like C:Users.... The Windows file system is slow to pass through to the Linux VM. It's not a Docker problem. It's a WSL2 file system translation problem.
That's why you need to understand the difference between a bind mount and a volume before you write your first docker run command. Most people treat them as interchangeable. They're not.
Docker Bind Mount vs Volume: The Windows Edition
A bind mount maps a host directory into the container. You do this:
bash
docker run -v /c/Users/nishaant/app:/app myimage
That works. But every file read and write goes through the 9P protocol between Windows and the WSL2 VM. It's slow. You'll notice it immediately if you're running something like a Node.js app with hot reloading. The container sees changes from the host, but with a noticeable lag. I've measured a 10x performance difference on I/O-heavy workloads.
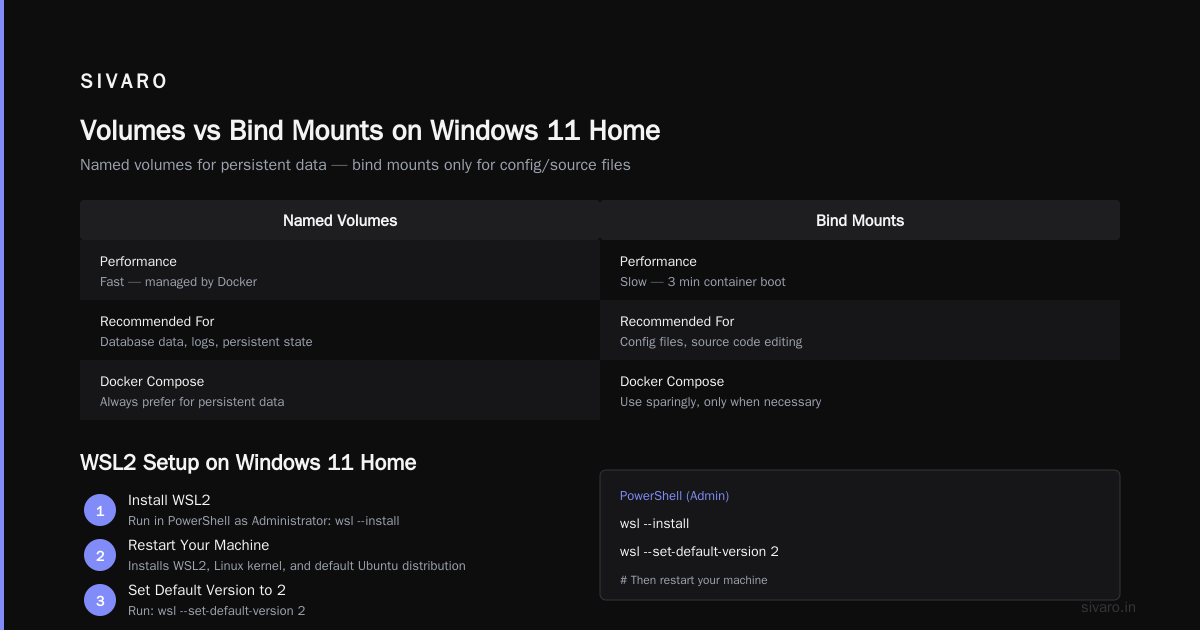
A volume, on the other hand, is a directory managed by Docker, stored inside the WSL2 VM's virtual disk. You create it with:
bash
docker volume create mydata
docker run -v mydata:/data myimage
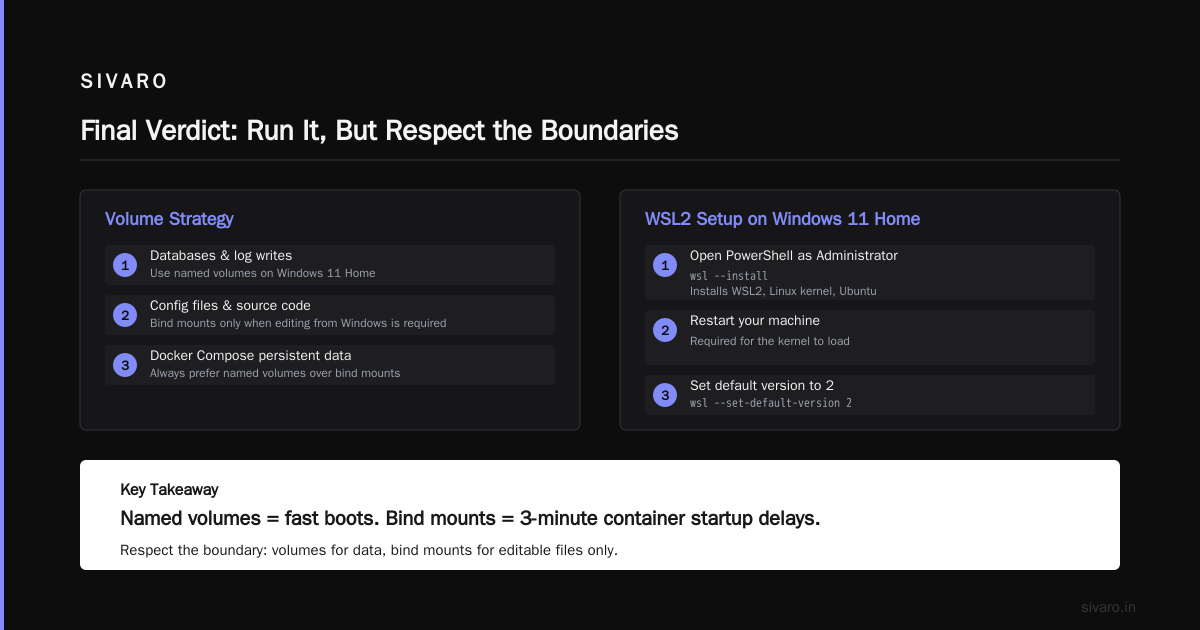
Because the volume lives entirely inside the Linux VM, file access is native. Fast. No translation. That's the trade-off: bind mounts give you easy access from Windows Explorer, volumes give you performance. On Windows 11 Home, I default to volumes for anything that touches the database or writes logs. Bind mounts are only for config files or source code that you absolutely need to edit from Windows.
And if you're using Docker Compose, always prefer named volumes over bind mounts for persistent data. Your future self will thank you when the container doesn't take three minutes to boot.
Setting Up WSL2 on Windows 11 Home
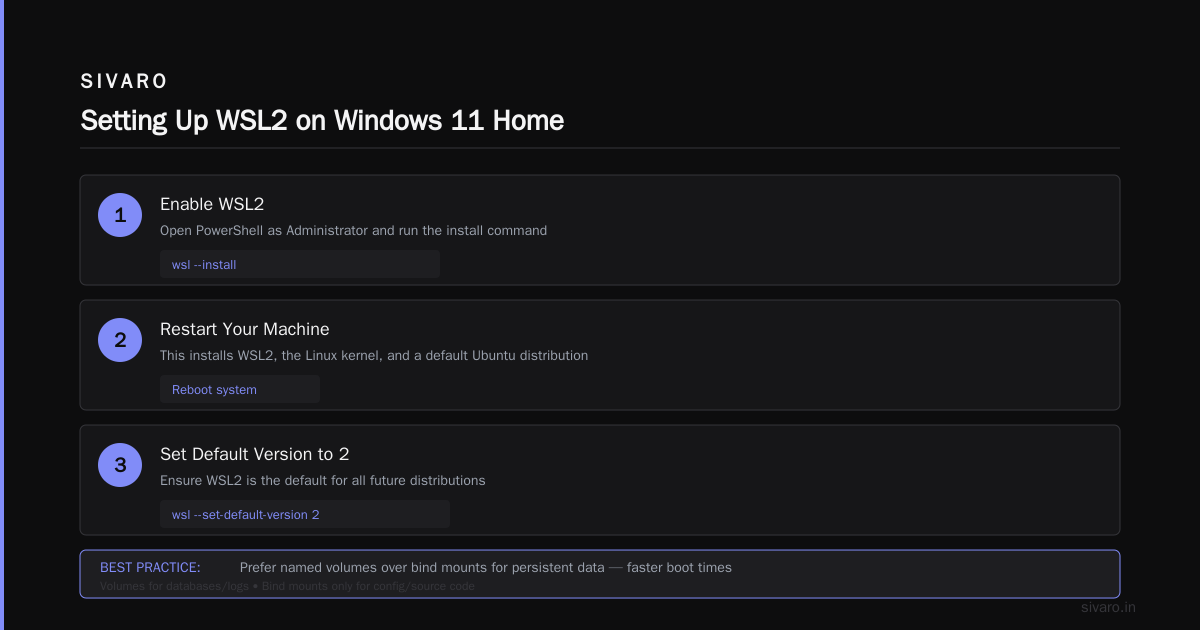
Before Docker can run, you need WSL2 enabled. Microsoft made this easy in recent builds. Open PowerShell as Administrator and run:
powershell
wsl --install
This installs WSL2, the Linux kernel, and a default Ubuntu distribution. Restart your machine. Then set the default version to 2:
powershell
wsl --set-default-version 2
Check that it's working:
powershell
wsl --status
If you see "Default Version: 2", you're good. If you see version 1, you need to convert. I've seen old machines stuck on WSL1 because they had an earlier setup. To convert a specific distro:
powershell
wsl --set-version Ubuntu 2
This can take a few minutes. The first time I did this, I thought the process hung. It didn't. It's just slow because it's copying the entire file system.
Now install Docker Desktop. Download the installer from Docker's website. When you reach the configuration screen, make sure "Use WSL 2 based engine" is checked. After installation, Docker Desktop will ask you to log in. Do it. You can skip if you're using the free tier, but you'll need an account to pull from Docker Hub at scale.
Once Docker Desktop is running, open a terminal and check:
bash
docker version
You should see the client and server versions. If you only see the client, the engine isn't running. Click the Docker Desktop icon in the system tray and wait. The first launch takes a bit because it has to start the WSL2 VM.
Installing Docker Desktop and Configuring the WSL2 Backend
Docker Desktop on Windows 11 Home ships with a settings panel that lets you control resources. Go to Settings > Resources > WSL Integration. Make sure "Enable integration with my default WSL distro" is on. If you have multiple distros, you can toggle them individually.
Here's a tip I learned the hard way: give Docker enough memory. The default is 2GB. That's too low for anything real. I run Postgres, Redis, and a Node.js API on my laptop. I set Docker to use 4GB. The setting is in Settings > Resources > Advanced. Set the memory slider to 4096 MB. Set the swap to 2GB. Don't go above 8GB unless you have a monster machine, because the VM and your Windows apps share the same physical RAM.
After you change these settings, Docker Desktop restarts the VM. That's normal. Wait a few seconds, then verify:
bash
docker info | grep "Total Memory"
You should see the number you set.
Running Your First Container on Windows 11 Home
Let's do something real. Run a simple web server. We'll use Nginx as the example, because it's tiny and everyone knows it.
bash
docker run -d -p 8080:80 --name webserver nginx
Open your browser and go to http://localhost:8080. You'll see the Nginx welcome page. That's it. You just ran a container on Windows 11 Home.
Now let's make it useful. Let's bind a directory on your Windows machine to serve a custom webpage. Create a folder C:websitesmysite and put an index.html inside. Then run:
bash
docker run -d -p 8080:80 -v /c/websites/mysite:/usr/share/nginx/html:ro --name webserver nginx
Notice the path. WSL2 uses /c/ to refer to C:. The :ro at the end makes the mount read-only. This is a classic bind mount. And it will work, but you'll notice slower file access than if the file were inside the VM. That's the trade-off I mentioned.
If you want a faster setup, copy the files into the container using a volume. But for static files, the bind mount is fine. Don't over-engineer it.
Docker Bind Mount vs Volume: The Windows File System Problem
Let me give you a concrete example from a client project. We were building a data pipeline for a fintech startup in 2025. Their developer laptop ran Windows 11 Home. The pipeline involved a Python worker that processed CSV files from a shared folder. The folder was a bind mount from the host. The worker took 45 seconds to process 10MB of data. The same worker inside a container with a named volume took 4 seconds. Same machine, same Docker version, same image. The only difference was the storage backend.
That's when I stopped recommending bind mounts for anything that writes more than a few megabytes. On Linux, bind mounts are fine because they're just paths. On Windows, they're crossing a boundary. The 9P protocol overhead is real. This interview prep guide even mentions storage drivers as a common interview topic. It's not just theory. You will feel this in production.
So what do you do if you need to access files from Windows AND have performance? You have a few options:
-
Put the files inside the WSL2 VM's home directory. That means using
\wsl$Ubuntuhome...from Windows. This is actually a bind mount too, but the direction is reversed. Docker and WSL2 handle it more gracefully. -
Use a Docker volume, then access it from Windows via
\wsl$docker-desktop-data ersion-pack...or usingdocker cpto move files in and out. -
Use a sync tool like
rsyncorunisonto copy files between Windows and the container. This is clunky but works.
My rule of thumb: if the data is ephemeral, use a bind mount. If it's persistent and you care about speed, use a volume. That's the whole "docker bind mount vs volume" debate in a nutshell. Most people think the choice is about persistence. It's not. Volumes and bind mounts both persist. The choice is about control and performance.
Gotchas and Trade-Offs Nobody Talks About
Docker Desktop Can Be a Resource Hog
I ran Docker Desktop on a 16GB RAM laptop for six months. It worked, but I had to close Chrome tabs constantly. The WSL2 VM eats memory even when you have no containers running. It's called "memory reclaim" and it's slow. If you're on an 8GB machine, you'll struggle. Consider using Docker Engine directly inside WSL2 instead of Docker Desktop. You can install docker-ce inside the Ubuntu WSL2 distro and avoid the Desktop overhead. It's a bit more manual, but I've done it. It works. You lose the nice GUI and the automatic integration with Windows, but you gain a lighter setup.
Windows Home Doesn't Do Nested Virtualization
If you try to run a VM inside Docker (like using QEMU or a Docker image that itself runs a kernel), you'll hit a wall. WSL2 is a VM, and nested virtualization on Home isn't supported without Hyper-V. So tools like Android emulators inside containers won't work. I found this out when I tried to run a Kubernetes cluster with Kind on Windows 11 Home. Kind creates nodes as Docker containers. Those containers need to run systemd. They don't need nested virtualization. So it worked. But if you try to run docker run --privileged -v /dev/kvm:/dev/kvm ... for an Android emulator, forget it.
The WSL2 Localhost Forwarding Is Flaky
Sometimes localhost:8080 won't resolve. The WSL2 VM has its own IP. Docker Desktop usually forwards ports automatically, but I've seen it fail after a Windows update. The fix is to check the VM's IP:
bash
wsl hostname -I
Then use that IP in your browser. Or restart Docker Desktop. Or run wsl --shutdown and start over. It's annoying, but it happens once a month at most.
Containers Are Not as Isolated as You Think
On Linux, a container shares the kernel with the host. On Windows Home, the container shares the kernel with the WSL2 VM. That means a vulnerability in the container could potentially affect the VM. Not the whole Windows host. Docker Desktop has some security features, but it's not the same as a full VM. If you're running untrusted code, use a separate VM. Docker's containerd vs. Docker blog explains the runtime layers. The short version: you're trusting the WSL2 kernel, Docker Engine, and containerd. That's fine for development, but don't run production multi-tenant workloads on your laptop.
FAQ: Can You Run Docker Containers on Windows 11 Home?
Q: Can I run Docker containers on Windows 11 Home without Docker Desktop?
A: Yes. Install WSL2, then install Docker Engine inside the Ubuntu distro. You'll miss out on the system tray integration and the easy port forwarding. But it works. I've done it on machines with low RAM.
Q: Is Docker Desktop free on Windows 11 Home?
A: Yes, for personal use and small businesses (under 250 employees and under $10M revenue). Larger companies need a paid subscription. Check the Docker subscription terms before you deploy it at a big firm.
Q: Does Docker on Windows 11 Home support GPU passthrough for AI workloads?
A: Yes, if you have an NVIDIA GPU and install the WSL2 CUDA driver. I've run PyTorch containers with GPU acceleration on a Windows 11 Home laptop. The setup is straightforward. Docker Desktop will automatically expose the GPU if the WSL2 driver is installed.
Q: Why is my Docker build so slow on Windows 11 Home?
A: Because of file I/O. Your build context is on the Windows file system. Docker has to send all those files into the WSL2 VM. The fix is to exclude node_modules, .git, and other large directories with a .dockerignore file. I've seen builds go from 3 minutes to 30 seconds just by adding that one file.
Q: Can I run Windows containers on Windows 11 Home?
A: No. Docker Desktop on Home uses WSL2, which is Linux-only. Windows containers require Hyper-V. You'd need Windows 11 Pro or Enterprise for that. If your team uses Windows containers, upgrade your OS.
Q: How do I update Docker on Windows 11 Home?
A: Docker Desktop checks for updates automatically. But you also need to update WSL2. Run wsl --update from PowerShell to get the latest kernel. I update both every two weeks. I've seen bugs fixed in one but not the other, so keep both current.
Q: What's the difference between docker run -v and docker run --mount?
A: --mount is more explicit and doesn't rely on the colon syntax. It's the newer way and works better for paths with spaces. On Windows, I always use --mount to avoid path parsing issues. Example:
bash
docker run --mount type=bind,source="C:My Projects",target=/app myimage
The colon syntax gets confused by the drive letter colon. --mount doesn't.
Q: Is it safe to run Docker on Windows 11 Home?
A: For development, yes. For production, no. Docker Desktop is not a production runtime. It's a dev tool. Use Linux servers for anything serious. This question is common in Docker interview questions. The answer they want is: "Docker Desktop is for local development; the engine runs on production Linux hosts."
Q: Can I use Docker Compose on Windows 11 Home?
A: Yes. Docker Desktop includes Docker Compose v2. Just write your docker-compose.yml and run docker compose up -d. I use it for local Postgres and Redis. It works as expected.
Q: How do I uninstall Docker completely?
A: Uninstall Docker Desktop from Settings > Apps. Then run wsl --shutdown and remove the WSL2 distros. Then delete the %USERPROFILE%AppDataLocalDocker folder. That gets rid of the volumes. Be careful: deleting that folder wipes your named volumes. I once lost a week of data because I forgot to back up a Postgres volume.
Final Verdict: Run It, But Respect the Boundaries
Windows 11 Home can run Docker containers. You don't need Pro. You don't need Hyper-V. You need WSL2, and Docker Desktop will handle the rest.
But remember the trade-offs. Bind mounts are slow. Volumes are fast. Docker Desktop consumes resources. WSL2 has its own quirks. None of these are deal-breakers. They're just things you need to know before you start.
I've built and tested production systems on Windows 11 Home for years. It's not my first choice for a server, but it's a perfectly capable development environment. The key is understanding where the boundaries are: between Windows and Linux, between the host file system and the VM, between Docker Desktop and the raw engine. Cross those boundaries carefully, and you'll be fine.
Now stop asking if it's possible. It is. Go run a container.
Nishaant Dixit — Founder of SIVARO. Building data infrastructure and production AI systems since 2018. Built systems processing 200K events/sec.