 SIVARO

How to Cut Kubernetes Costs With Karpenter (and Not Blow It)
You know that sinking feeling when you open the AWS billing dashboard and see a 30% spike in EC2 costs, and your first thought is "we didn't even deploy anything new"?
I’ve been there. More than once.
A year ago, we migrated one of SIVARO's production EKS clusters to Karpenter. The promise was simple: better bin-packing, faster scaling, lower costs. And it delivered. But only after we stopped treating Karpenter like a magic switch. That's what this guide is about — how to reduce kubernetes costs using karpenter without accidentally making them worse.
We'll cover what "Karpenter consolidation" actually does, why it can fail, how to pair it with spot instances responsibly, and how to monitor it so you don't get surprised by a $10K bill. Along the way I'll reference real configs, real mistakes, and real savings.
What Karpenter Is (and Isn't)
Karpenter is an open-source node lifecycle manager for Kubernetes. It replaces Cluster Autoscaler. But it's not just "Cluster Autoscaler 2.0." The fundamental difference: Cluster Autoscaler asks "do I need more nodes?" and adds the smallest node that fits the pending pod. Karpenter asks "given all my pending and running pods, what's the cheapest set of instances that fits them all?" and replaces existing nodes if a better combination exists.
That last part — replaces — is where the magic (and the risk) lives. Karpenter constantly consolidates. It looks at your cluster and asks: "Can I pack these pods onto fewer or cheaper instances?" If yes, it cordons, drains, and terminates old nodes, launching new ones. This is called Karpenter Consolidation, and it's the heart of cost optimization.
But consolidation only saves money if you configure it correctly. Otherwise it can thrash, restart workloads, and even increase costs.
Why Karpenter Can Be Expensive (Yes, Even Karpenter)
Let's address the elephant. You search "karpenter expensive why" and you'll find complaints. Here's why it happens:
-
You didn't set instance family constraints. Karpenter defaults to buying the cheapest instance from any family. If that's a tiny
t3.nanothat can't run your memory-heavy pods, your pods stay pending and Karpenter buys another nanos. You end up with 20 undersized nodes instead of 2 large ones. -
Consolidation is too aggressive and restarts pods that shouldn't be restarted — causing cascade failures and re-deployment costs.
-
You ignored spot interruptions and lost capacity during peak hours, forcing a surge of on-demand.
-
You never set
ttlSecondsAfterEmptyso nodes sit around for days with zero pods.
ScaleOps's 2026 guide on Kubernetes cost optimization calls this the "empty node tax" — paying for idle compute because you forgot to turn off the lights.
That's why "how to reduce kubernetes costs using karpenter" is actually a two-step process: first stop the bleeding, then optimize.
Step 1: Write a Good Provisioner (or NodePool)
Karpenter v1 uses NodePool resources (previously Provisioner). This is where you define constraints. Most people over-constrain or under-constrain. Here's what worked for us.
The "Don't Be Stupid" Baseline
yaml
apiVersion: karpenter.sh/v1beta1
kind: NodePool
metadata:
  name: default
spec:
  template:
    spec:
      requirements:
        - key: "karpenter.sh/capacity-type"
          operator: In
          values: ["spot", "on-demand"]
        - key: "node.kubernetes.io/instance-type"
          operator: In
          values:
            - "m5.large"
            - "m5.xlarge"
            - "m5.2xlarge"
            - "c5.large"
            - "c5.xlarge"
            - "r5.large"
            - "r5.xlarge"
      kubelet:
        maxPods: 58
  limits:
    cpu: 1000
  disruption:
    consolidationPolicy: WhenUnderutilized
    expireAfter: 720h
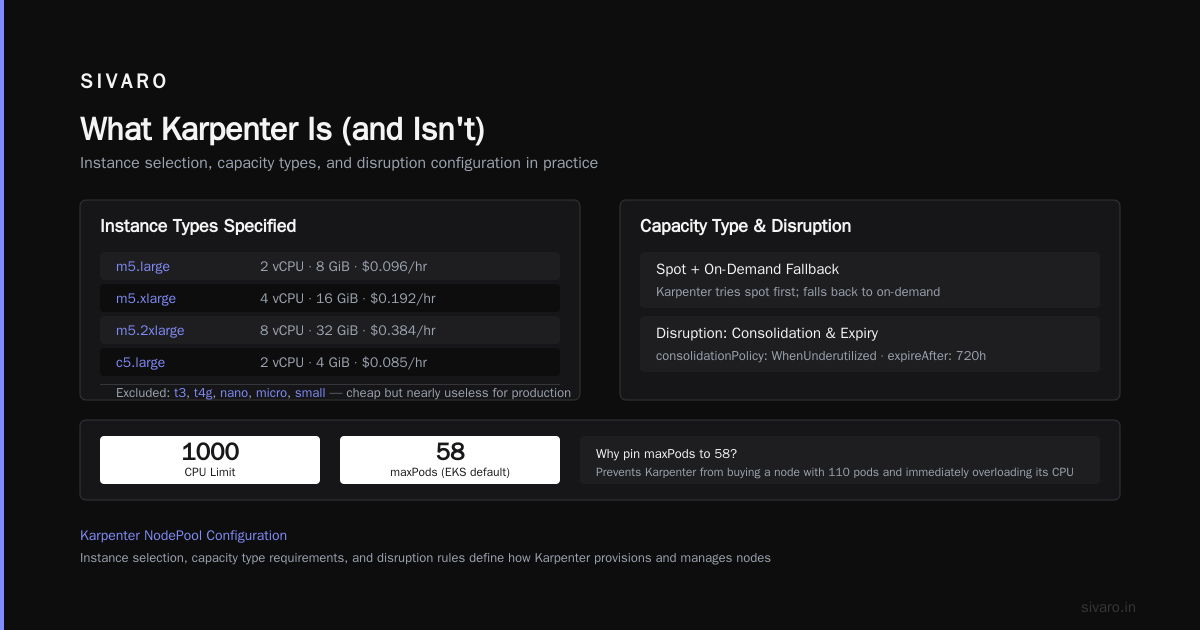
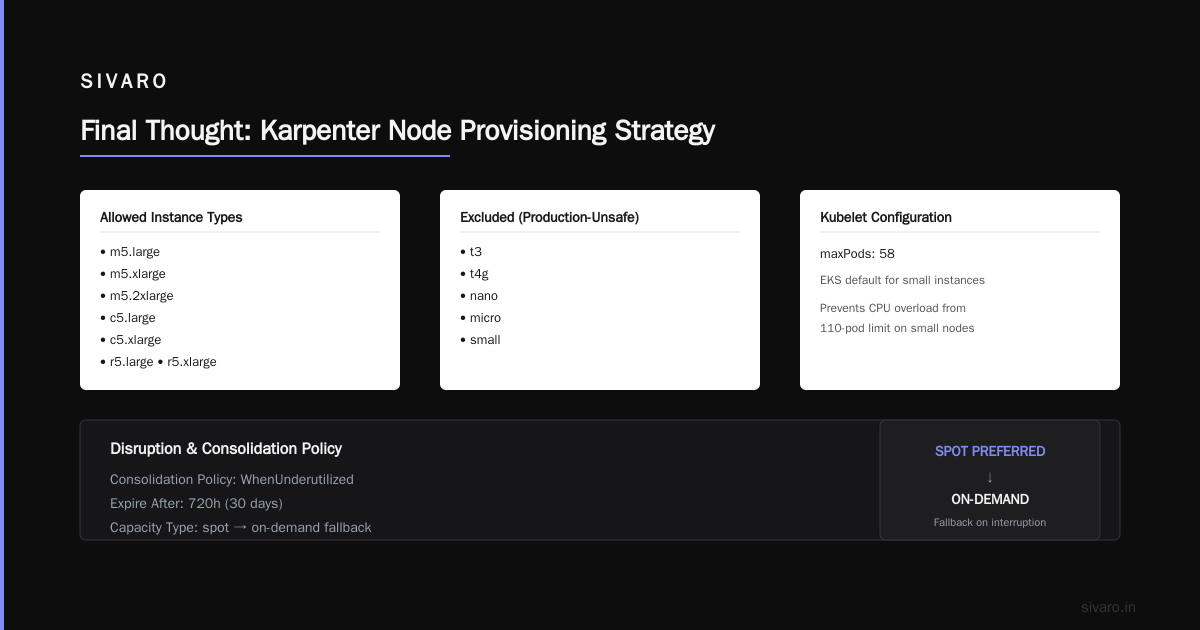
Notice what we didn't include: t3, t4g, nano, micro, small. Those instances are cheap but nearly useless for production workloads. We also pinned maxPods to 58 (EKS default for small instances) so Karpenter doesn't buy a node with 110 pods and then immediately overload its CPU.
Spot + On-Demand Fallback
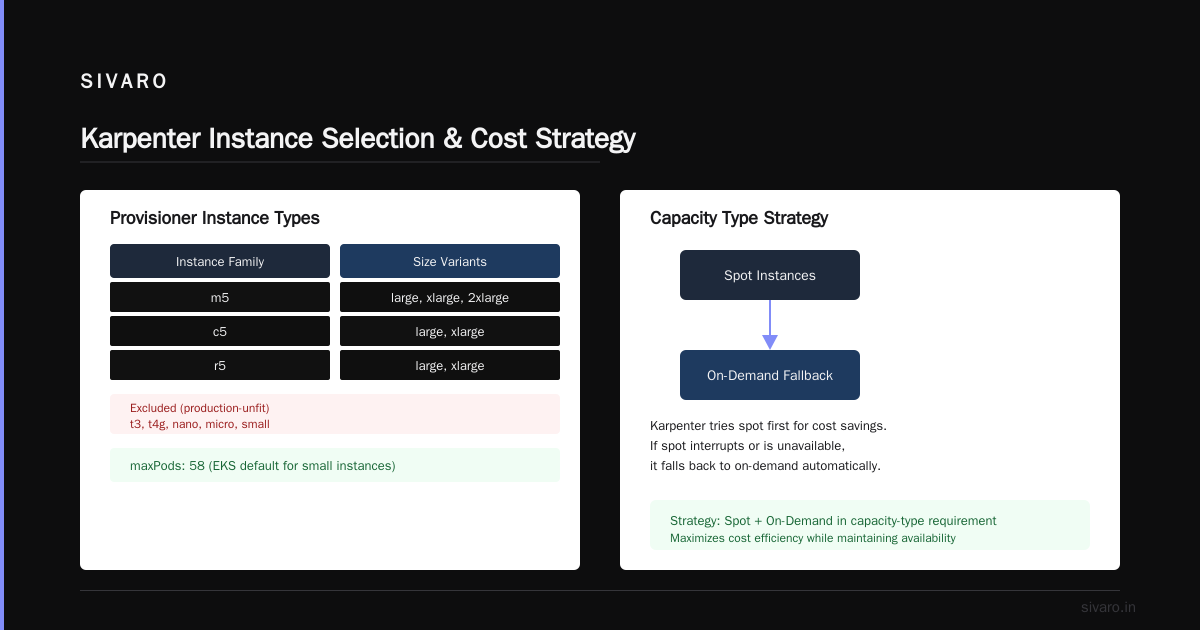
Set "spot" and "on-demand" in the capacity-type requirement. Karpenter will try spot first. If spot interrupts or isn't available, it falls back to on-demand. This is critical for reliability.
But — and this is a real lesson — don't make your NodePool 100% spot unless you have graceful retry logic. Tinybird's post about cutting AWS costs by 20% with Karpenter and spot instances shows exactly how they scale with spot while maintaining uptime. Read it here. Their trick: a Pod Disruption Budget for every critical workload and a topologySpreadConstraints to spread across spot and on-demand.
Step 2: Enable Consolidation — the Right Way
Karpenter offers three consolidation modes:
WhenEmpty– only consolidates nodes with zero pods.WhenUnderutilized– consolidates if resources can be packed more efficiently.Never– disables consolidation entirely.
WhenUnderutilized is the default and it's almost always what you want. But here's the nuance: it can be too aggressive if you haven't set proper resource requests.
You must set CPU and memory requests on every pod. If you don't, Karpenter sees "requests: 0" and thinks everything can fit on one single m5.xlarge. That leads to massive oversubscription and OOM kills.
The AWS blog on Karpenter consolidation has a great example: a cluster with 12 pods, each with no requests, was consolidated to 2 nodes — then crashed within 10 minutes because actual usage was double the requests.
So: lock your team into Vertical Pod Autoscaler or enforce resource limits at admission time. We use a Kyverno policy that rejects pods without explicit CPU and memory requests.
Step 3: Tame Disruption with Pod Disruption Budgets
Consolidation works by draining nodes. That means pods get rescheduled. If you're running stateful workloads (databases, queues, etc.), an uncoordinated drain can drop connections, corrupt data, or cause downtime.
This is where most people say "Karpenter is ruining my production!" But it's not Karpenter's fault — it's the lack of Pod Disruption Budgets (PDBs).
This personal take on PDBs and Karpenter nails the pain: they learned the hard way after a consolidation event took down all replicas of their message queue. Their post sums it up: "You don't need a PDB until you really need a PDB."
Here's what we use for all critical workloads:
yaml
apiVersion: policy/v1
kind: PodDisruptionBudget
metadata:
  name: my-app-pdb
spec:
  minAvailable: 2
  selector:
    matchLabels:
      app: my-app
Set minAvailable to a number that ensures at least N replicas stay running during draining. For stateless web services, maxUnavailable: 1 is fine.
Without PDBs, Karpenter's consolidation will still work — it'll just restart all your pods. With PDBs, it respects the budget and waits for new replicas to become Ready before draining old ones.
Step 4: Spot Instance Best Practices (The Real Savings)
Spot instances can reduce your compute cost by 60–90% compared to on-demand. But they come with an interrupt rate of about 5% per month per instance (varies by instance family and region). If you mix spot and on-demand in the same NodePool, Karpenter will automatically handle interruptions by moving pods to on-demand nodes.
But here's the mistake: running spot exclusively without fallback capacity causes a "spot storm" — all your spot nodes get reclaimed simultaneously, and Karpenter has to launch on-demand in a panic, which can exceed your budget.
Solution: set a capacity spread like this:
yaml
spec:
  template:
    spec:
      requirements:
        - key: "karpenter.sh/capacity-type"
          operator: In
          values: ["spot", "on-demand"]  # spot preferred, on-demand fallback
      nodeClassRef:
        group: eks.services.k8s.aws
        kind: NodeClass
        name: default
Also, diversify across instance families. Don't just use m5 — include c5, r5, m6i, c6i. Spot pricing varies wildly per family. If one family gets reclaimed en masse, fallback to another spot family before touching on-demand.
How to Monitor Kubernetes Costs With Karpenter
You can't reduce what you don't measure. But measuring Karpenter costs is tricky because nodes come and go in minutes.
Three metrics you need to watch:
- Node count over time – a sign of thrashing if it goes up and down rapidly.
- Consolidation events – how many nodes were replaced per hour. Too many means your pods are ephemeral or your requests are wrong.
- Spot interrupt rate – if it's >10%, increase instance diversity.
We export Karpenter metrics to CloudWatch using the OpenTelemetry Collector:
yaml
apiVersion: v1
kind: ConfigMap
metadata:
  name: otel-collector-config
  namespace: opentelemetry
data:
  otel-collector-config.yaml: |
    receivers:
      prometheus:
        config:
          scrape_configs:
            - job_name: 'karpenter'
              static_configs:
                - targets: ['karpenter.karpenter.svc.cluster.local:8000']
    exporters:
      awscloudwatchlogs:
        log_group_name: "/eks/karpenter-metrics"
        log_stream_name: "karpenter-consolidation"
    service:
      pipelines:
        metrics:
          receivers: [prometheus]
          exporters: [awscloudwatchlogs]
Then set up CloudWatch alarms for karpenter_nodes_created > 50/hour or karpenter_nodes_terminated > 50/hour. If you see that, something is wrong.
Concepts page on Karpenter.sh has a full list of available metrics.
Step 5: Set Limits and Grace Periods
Karpenter respects a global limits field in your NodePool. Never leave it empty. We set cpu: 1000 and memory: 4000Gi — that's our cluster ceiling. It prevents runaway scale-up if a pod's resource request is missing or misconfigured.
Also set spec.disruption.consolidateAfter to a non-zero value. Default is immediate. We use 60s — it prevents consolidation from triggering on the first empty-request fluctuation. A 60-second buffer gives pods time to stabilize before Karpenter decides to evict them.
The Surprising Save: Right-Sizing Your Requests
This isn't strictly Karpenter, but it's the companion you can't ignore.
If your team has oversized resource requests (e.g., 1 CPU per pod when actual usage is 0.2 CPU), Karpenter can't bin-pack efficiently. You'll have low utilization and high node count.
We implemented the Vertical Pod Autoscaler in "recommender" mode and set updatePolicy: "Off" — so it only tells us what resources pods should request, without automatically changing them. Then we patched the manifests in our CI/CD pipeline.
The result: average pod CPU request dropped from 1.2 to 0.4. Node count halved. Savings: ~40% on EC2.
Step 6: Use ttlSecondsAfterEmpty and expireAfter
Two settings that are easy to forget:
spec.disruption.ttlSecondsAfterEmpty— when a node has zero pods (drained by consolidation), how long before it's terminated? We use30(seconds). Default is infinite if not set.spec.disruption.expireAfter— max lifetime of any node. We use720h(30 days). This forces Karpenter to rotate nodes periodically, which is good for security patches and prevents stale node AMI drift.
Without these, nodes can sit around empty or very old, costing you money for no reason.
Step 7: Test in a Non-Production Cluster First
I know, obvious. But I've seen teams apply Karpenter configs straight to prod and then spend the weekend firefighting.
Spin up a small EKS cluster with Karpenter and a load generator (I like kubernetes-bench or hey with a DaemonSet of CPU-intensive pods). Watch what happens when consolidation kicks in. Tune your PDBs, limits, and instance families.
FAQ
Q: Does Karpenter work with EKS Fargate?
No. Karpenter manages EC2 nodes. Fargate is a separate serverless compute. They compete, not complement.
Q: Can Karpenter scale to zero nodes?
Yes, if you set spec.disruption.consolidationPolicy: WhenUnderutilized and have zero pods. But your control plane still costs money.
Q: How do I handle stateful workloads (StatefulSets, PVCs)?
Use PDBs with minAvailable: <replicas>. Also set pod anti-affinity so they spread across nodes. Karpenter will not violate PDBs, so nodes won't drain unless safe.
Q: Is Karpenter better than Cluster Autoscaler for cost?
In my experience, yes — because consolidation actively packs pods tighter. Cluster Autoscaler only adds/removes nodes, never replaces them with better-sized ones. We saw 15-20% savings after switching to Karpenter with consolidation enabled.
Q: What's the biggest "gotcha" people miss?
Not setting resource requests. Karpenter's consolidation assumes your pods actually need the resources they request. If requests are missing or inflated, it makes wrong decisions.
Q: How do I monitor Karpenter costs specifically?
Use the Karpenter metrics endpoint and export to CloudWatch. Also track EC2 instance types and hours. Tinybird's post on monitoring with Karpenter shows how they built a dashboard using Karpenter's prometheus metrics and Cost Explorer.
Q: Can Karpenter use GPUs?
Yes, but you need to specify instance families with GPUs (p3, p4, g4dn, etc.) in the NodePool requirements. Be careful with spot GPUs — they're interrupted more often.
Final Thought
Reducing Kubernetes costs isn't about chasing the cheapest instance. It's about making your compute match your workload dynamically. Karpenter gives you the tool — but only if you understand consolidation, PDBs, spot diversity, and resource requests.
Start with the baseline NodePool I shared. Add PDBs to your critical workloads. Set limits. Enable metrics. Then watch your bill drop — not because you're doing less, but because you're doing it smarter.
I'd rather pay for 10 nodes running at 80% than 15 nodes running at 40%. That's the game Karpenter lets you win.
Nishaant Dixit — Founder of SIVARO. Building data infrastructure and production AI systems since 2018. Built systems processing 200K events/sec.