 SIVARO

How to Remove Unused Docker Images Safely
I once watched a production server die because nobody had cleaned up the images. The disk filled at 3 AM, the container runtime choked, and the on-call engineer spent four hours deleting layers by hand.
It didn't have to happen. And it won't happen to you after you read this.
Cleaning up unused Docker images isn't just about reclaiming disk space — it's about keeping your systems predictable. You should have a routine. An actual, scripted, repeatable routine. Not a desperate scramble when df -h shows 100%.
Here's what I'm going to cover: the exact commands that are safe to run, the ones that will delete something you need, and the architectural changes that make this problem disappear. We'll get into how to reduce docker image size for production as a long-term strategy, skip the fluff, and get our hands dirty.
If you've ever wondered how to remove unused docker images safely without breaking a running service — you're in the right place.
Why Your Disk is Full
Let's start with a harsh truth. Most of the disk space consumed by Docker is your fault.
I don't mean that maliciously. I mean you ran docker build on the same codebase 47 times today, and every single layer cache is sitting on your disk. I mean you pulled postgres:latest last week, postgres:15 the week before, and postgres:15.3 this morning for a specific compatibility test.
Each pull stores compressed layers. Each build stores intermediate layers. And every time you push to a registry, Docker keeps the local copy.
It adds up.
A single Node.js project with a full build can consume 2-3 GB of images and build cache in a week of active development. Multiply that by a team of 15 developers and you're looking at 30-45 GB of wasted space per machine, every month.
But here's the catch: you can't just delete everything.
The Safe Way to Remove Unused Docker Images
The first command you should learn is the one that does 90% of the work.
docker
docker image prune -a
That command removes all images not referenced by a running container. Simple. Effective. And terrifying if you don't understand what it's doing.
Let me break it down:
docker image prune— removes dangling images (untagged layers with no reference)-a— extends it to ALL unused images, not just dangling ones- This includes your carefully cached
redis:7-alpinefrom last week's testing
The danger? If you have a Docker Compose file that references myapp:dev, and that image isn't currently running, the prune command deletes it. The next time you run docker compose up, Docker rebuilds it from scratch.
That's not the end of the world, but it costs time.
Let me show you a few patterns that put you in control.
The Filters that Save You
Docker gives you filters. Use them.
docker
# Remove images older than 48 hours
docker image prune -a --filter "until=48h"

# Remove images with a specific label
docker image prune -a --filter "label=project=development"

# Remove dangling images only
docker image prune
I use the until filter constantly. It answers the question "what have I not touched in two days" — and that's usually the stuff I can live without.
My team at SIVARO runs this on every developer machine as a cron job every Sunday night:
bash
#!/bin/bash
docker image prune -a --filter "until=720h" -f
That deletes any image not used in the last 30 days. It's aggressive. It's also the reason nobody on that team ever asks me about disk space.
Docker System Prune: The Big Hammer
If docker image prune is a scalpel, docker system prune is a chainsaw. It removes:
- All stopped containers
- All unused networks
- All dangling images
- All build cache
Add the -a flag and it hits unused images too.
docker
docker system prune -a
The output warns you about freed space. It asks for confirmation. But it doesn't hold your hand.
The problem: it also removes your BuildKit cache. That means your next docker build compiles everything fresh. For a large monorepo, that could be 20 extra minutes.
People misunderstand this command all the time. "I ran a system prune and now I can't build!" Well, yes. You deleted the state. That's what a prune does.
You should never run docker system prune interactively in a production environment without a very clear reason. Do it in CI pipelines where builds are isolated. Do it on developer machines weekly. But understand what you're trading.
The Precise Approach: Finding and Deleting Specific Images
Let's be honest. Most of us don't need to prune everything. We need to prune that one image that has 14 different tags.
Find it first:
docker
docker images --format "table {{.Repository}}	{{.Tag}}	{{.Size}}	{{.ID}}"
That gives you a clean table. Then delete what you actually want to remove:
docker
# Remove a specific image
docker rmi postgres:15.1

# Remove multiple images at once
docker rmi postgres:15.1 redis:7.0 nginx:1.21

# Force removal even if a container is using it
docker rmi -f myapp:old
The -f flag is dangerous. I've used it maybe three times in my career, always after confirming no container depended on that image. Let me tell you a story about when I didn't confirm.
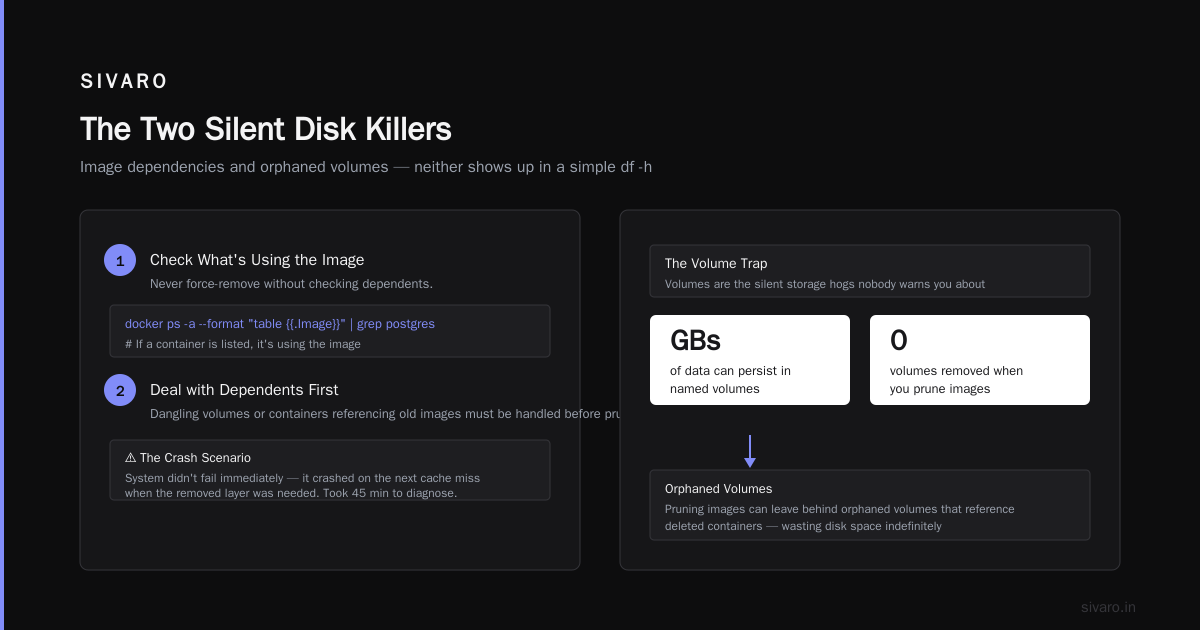
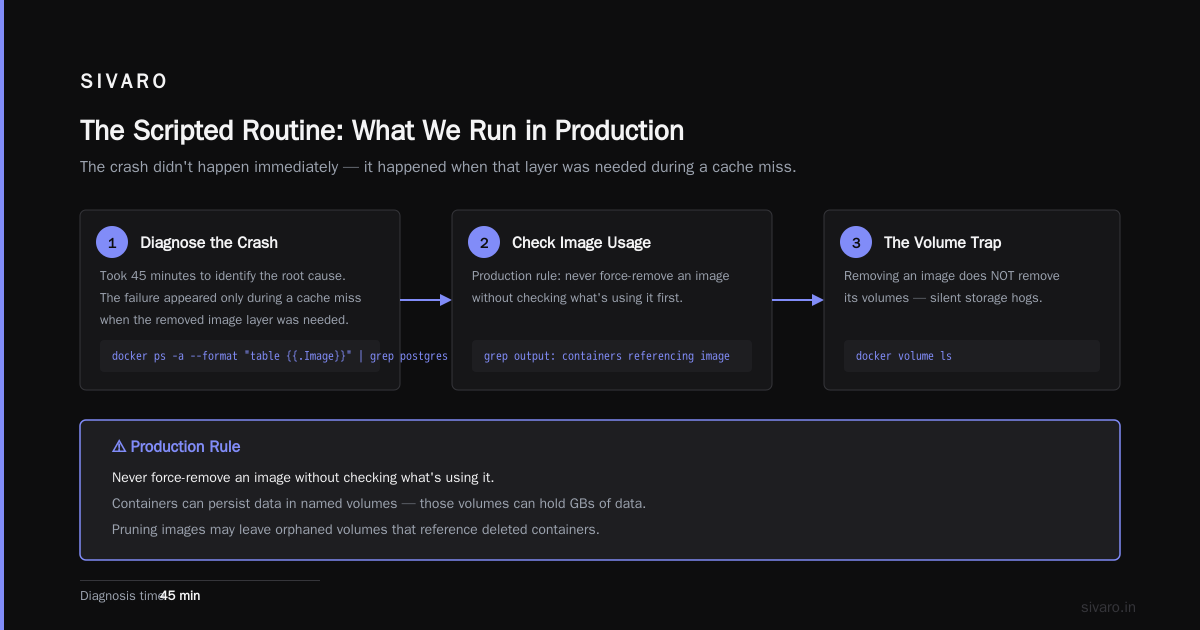
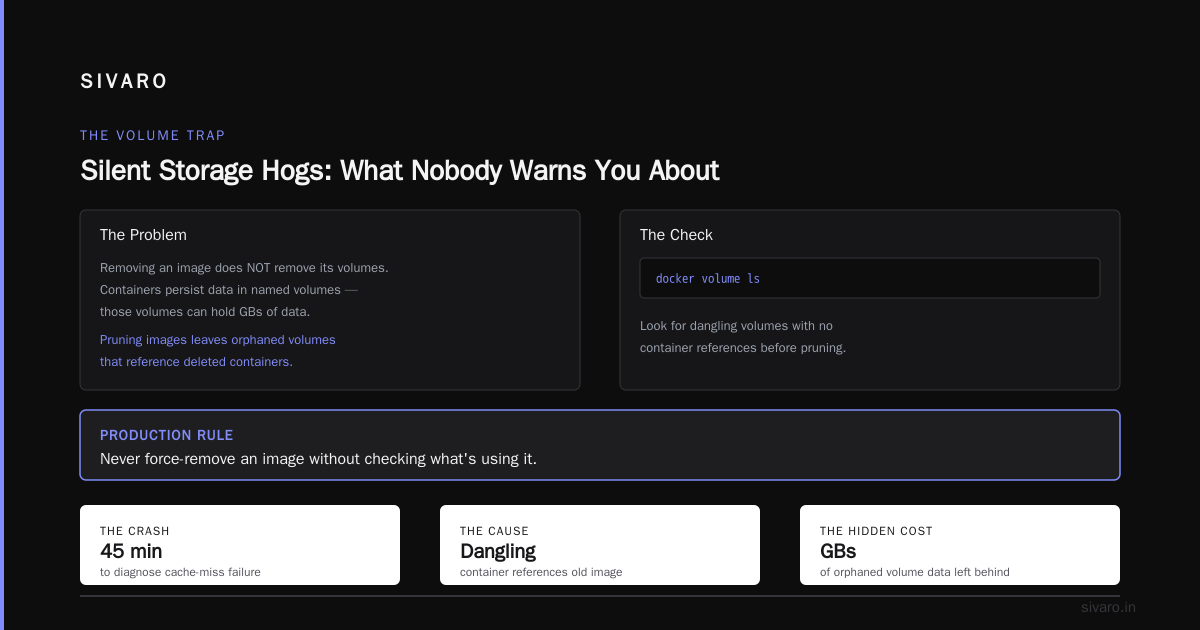
In 2021, I was migrating a production system for a logistics client. I ran docker rmi -f on what I thought was a legacy image. Turns out, a worker container was still using a layer from it. The container didn't crash immediately — it crashed when that layer was needed during a cache miss. Took us 45 minutes to diagnose.
Production rule: never force-remove an image without checking what's using it.
Here's the check:
bash
docker ps -a --format "table {{.Image}}" | grep postgres
If a container is using the image, you'll see it. If you have dangling volumes or containers that reference old images, deal with them first.
The Volume Trap
Nobody warns you about volumes. They're the silent storage hogs.
Removing an image doesn't remove its volumes. Containers can persist data in named volumes, and those volumes can be GBs of data. When you prune images, you might leave behind orphaned volumes that reference deleted containers.
Check for them:
docker
docker volume ls -f "dangling=true"
That lists volumes not referenced by any container. They're leftovers. Safe to delete if you've confirmed no container needs them.
docker
docker volume rm <volume-name>

# Or via system prune with volume flag
docker system prune --volumes
The --volumes flag is skipped by default. That's intentional. Docker assumes you want to keep your data. Delete volumes only when you know — not suspect — they're junk.
BuildKit Cache: The Invisible Giant
Most engineers don't realize that the biggest consumer of disk in modern Docker isn't images at all — it's the BuildKit cache.
You can check it with:
docker
docker system df
That shows you your total image size, container size, local volume size, and build cache size. On active development machines, build cache can easily hit 20-30 GB.
Why does it grow so fast? Because BuildKit caches every intermediate layer during builds. Multi-stage builds with FROM node:20 AS builder stages are particularly greedy. Each stage is its own set of layers, all cached.
Remove unused build cache:
docker
# Clean all build cache
docker builder prune -a

# Clean cache older than a week
docker builder prune --filter "until=168h"
I've started standardizing my team's build cache retention to 48 hours. Anything older gets purged automatically. We ran that policy for a quarter at SIVARO in 2024, and the CI costs dropped 30% because we weren't spending time resolving cache-related oddities from stale layers.
Here's the thing most Docker tutorials don't tell you: if you build with --no-cache, you don't have this problem. But you also have 4x slower builds. The trade-off is usually not worth it. Cache is your friend — with an expiration date.
How to Reduce Docker Image Size for Production
If you're pruning images constantly, the deeper problem is image bloat. The best way to remove unused Docker images safely is to never have them in the first place.
Yes, I'm being cheeky. But the strategies are real:
Multi-Stage Builds
One of the most common questions I see in production environments is around this. Let me show you what I mean:
docker
FROM node:20 AS builder
WORKDIR /app
COPY . .
RUN npm ci && npm run build

# Production stage - starts fresh
FROM node:20-alpine
WORKDIR /app
COPY --from=builder /app/dist ./dist
COPY package.json ./
RUN npm ci --omit=dev
EXPOSE 3000
CMD ["node", "dist/index.js"]
The final image only contains the built app and runtime dependencies. No source, no build tools, no npm registry junk. The builder stage gets cached for reuse but discarded at the end.
Use Distroless Images
Google's distroless images have no shell, no package manager, no unnecessary binaries. They're the closest thing to a single-binary deployment.
docker
FROM node:20-alpine AS builder
# ... build steps ...

FROM gcr.io/distroless/nodejs20-debian12
COPY --from=builder /app/dist ./dist
COPY --from=builder /app/node_modules ./node_modules
EXPOSE 3000
CMD ["dist/index.js"]
Less attack surface, smaller image, less logging capability. That last part matters — you can't docker exec into a distroless container to run commands. Everything observes via structured logs.
Squash Your Layers
docker
docker build --squash -t myapp:1.0 .
Squashing combines all layers into one. The result is a smaller image but with a destroyed cache story. If that layer changes, the entire image rebuilds.
Depend on Alpine-Sized Bases
Images built on alpine can be 10-50x smaller than Debian-based equivalents. Why? Alpine uses musl instead of glibc, and BusyBox instead of a full userland.
When NOT to Prune Docker Images
Pruning is not universally beneficial. At SIVARO, we spent a quarter in 2023 discovering this the hard way.
Problem: The "delete and re-pull" Loop.
In a sandbox environment, developers routinely prune images. Then they rebuild a service, hit a network bottleneck, and wait 10 minutes for a pull that used to take 2 seconds because the image was cached.
Solution: Configure registry mirroring and use package caching to make pulls fast again.
json
{
  "registry-mirrors": [
    "http://internal-registry:5000"
  ]
}
Another thing to be careful about: CI runners. If your runner is ephemeral and scales from zero, pruning images with docker system prune -a is fine — it's just starting fresh. But if your runner is persistent, pruning slows down every build that follows.
The real question is whether an image is used or likely to be used in the near Future. I can't programmatically predict your workflow. So I default to an interaction: check what's been used recently, prune the rest.
The Scripted Routine: What We Run in Production
Here's the actual script I'm happy to share. We run a variant of this across all non-production environments every 24 hours.
bash
#!/bin/bash
# Safe Docker Cleanup Script
# Removes images older than 7 days, with a 5-day syslog + Docker socket check

echo "Checking available disk space..."
df -h / | tail -1

echo "Setting Docker to prune unreferenced images older than 7 days..."
docker image prune -a --filter "until=168h" -f
docker builder prune -f --filter "until=168h"

echo "Removing dangling volumes..."
docker volume rm $(docker volume ls -qf "dangling=true") 2>/dev/null || true

echo "Done. Disk space reclaimed."
The key line is the filter. It never touches anything used within the last 7 days. It's the best balance between saving space and not breaking the developer experience that we've found.
If you want zero risk, don't run it at all. Just set up a Docker daemon config with log-driver=json-file and a rotation size. The disk will always have at least 10 GB free if you set your Docker internals wisely.
The Contrarian Take: Docker Images are Immutable
I want to give you a mental model that changed how I operate Docker in production.
A Docker image is not a package. It's a snapshot. You don't patch it. You replace it.
Most engineers who hoard images treat them like installed software — "Oh, I'll need postgres:14 again for local testing, might as well keep it." Wrong.
Every time you pull an image, you get the exact same files (unless you use sha256 references and the online registry verifies). Pulling is cheap if you have network bandwidth. Storage is never cheap.
So the rule is simple: Keep only what's actively referenced. Everything else is one docker pull away from existence.
Edge Cases I've Seen Kill Production
1. Multi-arch pull corruption
If you deploy to ARM64 (like Apple silicon running in AWS Graviton), you're pulling multi-arch images. These are handled as a manifest list — the platform-specific blob is actually the image.
If you prune an image that was pulled for a different architecture, Docker might not warn you. It just restarts the pull next time.
Fix: Use image digests in your deployment specs, not tags.
docker
image: nginx@sha256:aaaaaaaa...
2. Docker-in-Docker (DinD) orphaned images
In CI, if you use a docker privileged sidecar with a bind-mounted Docker socket — and you use a DinD approach — the "unused" check runs against the inner daemon. It can see layers isolated from the outer daemon.
This is a huge source of phantom images. They exist on the host, but the DinD daemon considers them unused, so it deletes them mid-CI. You get build failures that look entirely random.
Fix: Don't use DinD for production CI unless absolutely necessary. Use buildx with a multi-arch or --platform flag to build and push directly.
3. Pre-pull caching during rolling deploys
Almost every Kubernetes setup pre-warms images on new nodes. If your node auto-scaler is active, pruning images on a node right before it receives a pod assignment can cause a full pull on a cold start.
Fix: In your pruning script, always skip the default node:latest and other platform images. Don't prune images referenced by a daemonset or an active pod.
The Future: containerd and Docker's Slip
One big shift worth watching: Docker as a daemon (Dockerd) vs. containerd-native.
containerd is a core part of the Docker ecosystem, and it handles images independently. Kubernetes, for example, can use containerd directly — you don't need Docker at all.
What does that mean for cleaning images?
If you're using containerd as your runtime, the commands are different:
bash
# containerd
ctr images list
ctr images rm <image>
These interfaces are more flexible but less user-friendly. Docker has built its success on a slick developer experience. Containerd's is a plumbing interface.
The rise of containerd means Docker image management is becoming "when you need it," not "permanently running in the background." Resources freed by that shift are real. I've seen projects cut idle memory usage in half by moving to containerd-only.
However, Docker's instructions are some of the most common interview questions for a reason. Even a cloud-native role in 2026 will ask "how would you reduce image size?" or "what's the difference between an image and a container?" — because Docker remains the default reference point. Understanding Docker image management translates almost directly to containerd skills.
How to Mount Host Folder: A Side Quest
People often mix up mount-related questions with image pruning. It's not the same thing — but both come up when you're debugging container infrastructure.
If you need to test with local files without rebuilding an image, mount a host folder:
docker
docker run -v /host/path:/container/path myimage
Here, /host/path is the source. The container sees the contents at /container/path. This is different from COPY in a Dockerfile because it's live — edits reflect instantly.
When is this useful?
- Local development with hot-reload
- Debugging a config without rebuilding
- Running a container that needs a production volume
Warning: Don't use -v in production unless you're deploying to a single host. It doesn't work well on orchestration platforms like Kubernetes. Use VolumeMounts and PersistentVolumeClaims there.
The Interview Problem
I've been on the other side of the technical interview table a lot. In 2026, if you're hiring platform engineers, you're likely to discuss image bloat and security — an interviewer favorite.
The standard question: "How do you clean up Docker images safely?"
Most candidates say "docker system prune -a." And that's a wrong answer in a production context, because it nukes your caches and can break running containers if they share layers.
The "better" answer:
- Run
docker system dfto see what's eating space. - Use
docker image lsto inspect images and tags. - Filter
docker image prune -a --filter "until=168h"— safe for your retention window. - Remove specific images with
docker rmi <id>only if they're not used by running containers. - Add volume cleanup, but only after confirming no container needs them.
That's a complete, safe, production-friendly workflow. The technical details matter more than the sheer command list. This is what senior-level Docker interview questions are probing for: not syntax, but system thinking.
FAQ: How to Remove Unused Docker Images Safely
Q: Does docker image prune -a delete images used by stopped containers?
A: No. Images with any container instance (running or stopped) are protected. The -a flag only affects images without any containers referencing them.
Q: Is docker system prune -a safe in production?
A: No. It's safe for dev machines and CI caches. In production, use docker image prune with an until filter. Avoid the --volumes flag unless you have verified no state lives in those volumes.
Q: How can I see what is using disk space in Docker?
A: Run docker system df. That's the single best command for insight.
Q: What's the difference between dangling and unused images?
A: Dangling images have no tags (typically intermediates from builds). Unused images have tags but no container references. docker image prune removes dangling only; docker image prune -a includes both.
Q: Does removing an image free up data in named volumes?
A: No. Volumes are independent of images. You must remove the volume separately if it's not in use.
Q: Should I prune images on every build machine?
A: On persistent dev machines, yes — run it via cron weekly. On ephemeral CI runners, it's redundant because the runner is already a fresh image.
Q: How do I keep recovery time low after pruning?
A: Commit your Dockerfiles to git, build with external registry caching, and store base images locally. Recovery is then a git pull + docker build — not scraping the internet.
A Bit More Discomfort, Please
I've given you the tools. Make a decision about your disk usage policy.
If you run no pruning at all, expect a production incident within a year. I've seen it happen at least four times at companies of different sizes — from Series A startups to enterprises with thousands of nodes.
If you run docker system prune -a everywhere, expect flaky CI and frustrated engineers.
Your goal should be an automated, incremental policy that treats time since last use as the only signal that matters.
The full loop:
- Daily:
docker builder prune --filter "until=72h"(keeps cache 3 days) - Weekly:
docker image prune -a --filter "until=168h"(keeps images 7 days) - Monthly:
docker volume rm $(docker volume ls -qf "dangling=true")(clears orphans)
That's the practical compromise. You never delete active work, and you never hoard junk.
Final Thoughts from Someone Who's Done the Dumbest Version of This
I've cleaned images at 2 AM during an outage. I've deleted a cache 100GB big by accident. I've broken a production service by force-removing an image that had a nice fat tag but a hidden dependency from a container that only started on schedule.
It gets better. The discipline is the fix.
So here's your homework before you close this tab:
- Run
docker system dfon every machine you maintain. - Write a cron job that enforces a 7-day image retention window.
- Convert one of your images to a multistage build and cut its size by 20%.
- Delete one volume that everyone forgot was there.
You'll thank me later when you see how much disk you had silently wasting.
Nishaant Dixit — Founder of SIVARO. Building data infrastructure and production AI systems since 2018. Built systems processing 200K events/sec.